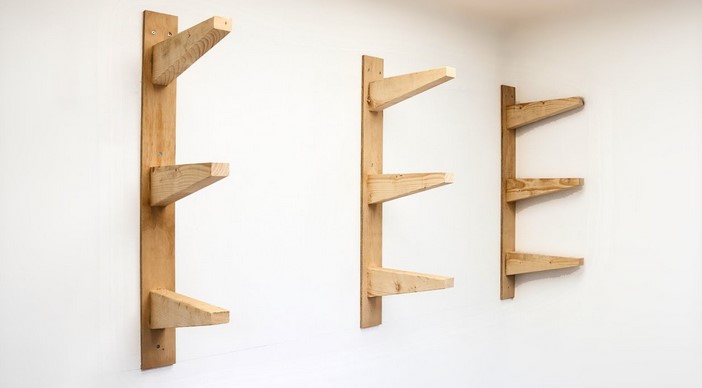
When it comes to organizing and decorating a space, shelves are an essential element. They provide storage, enhance the aesthetics of a room, and allow you to display personal items like books, plants, and collectibles. While store-bought shelving units are widely available, there’s a growing trend of creating DIY shelving brackets to customize and add a personal touch to your home. These easy-to-make brackets are not only practical but can also be a fun project for those looking to bring a unique style to their space. In this article, we’ll explore why DIY shelving brackets are a great storage solution, how to make them, and tips for incorporating them into your home design.
Why Choose DIY Shelving Brackets?
1. Customization and Personalization
One of the main advantages of making your own shelving brackets is the ability to fully customize them to suit your needs and design preferences. Whether you prefer a rustic industrial look, a modern minimalist style, or even a more intricate, decorative approach, DIY shelving brackets offer endless possibilities for personalization. You can choose the materials that match your existing décor, such as reclaimed wood, metal pipes, or even leather straps, and create a design that reflects your unique taste.
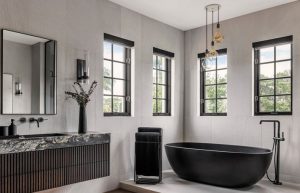
Unlike pre-made brackets, which may only come in standard sizes and finishes, DIY brackets give you the freedom to adjust dimensions and styling to fit your exact requirements. For instance, you can make smaller, discrete brackets for light floating shelves in your bathroom or large, heavy-duty brackets for long shelves in your living room. This flexibility ensures that your shelves not only function well but also enhance the overall aesthetic of the room.
2. Cost-Effective Solution
Another reason why DIY shelving brackets have gained popularity is their cost-effectiveness. Store-bought shelving systems and brackets can be expensive, particularly when you’re outfitting an entire room or need multiple units for a large space. By choosing a DIY approach, you can often save a significant amount of money, as you’re able to source materials yourself. Items like scrap wood, steel rods, or even repurposed materials from other projects can be transformed into functional, attractive brackets.
Moreover, you can design your shelves to match the weight and size of the items you intend to store, preventing you from overpaying for heavy-duty brackets when lighter, simpler options would suffice. With a bit of creativity and resourcefulness, you can create stylish shelving brackets for a fraction of the price of their commercial counterparts.
3. Sustainability and Repurposing Materials
DIY projects provide an excellent opportunity to repurpose materials that would otherwise go to waste, making them an eco-friendly choice. Using reclaimed wood, old pipes, or vintage metal pieces can reduce the demand for new materials while giving these items a second life. This not only helps minimize your environmental impact but also ensures that your shelving brackets are unique and full of character.
The sustainable nature of DIY shelving brackets appeals to those who want to incorporate more eco-conscious practices into their home improvement projects. Furthermore, the act of repurposing materials adds a sense of history and originality to your shelves, making them more than just functional storage solutions but also conversation pieces.
How to Build DIY Shelving Brackets
Materials and Tools
Before you get started with building your DIY shelving brackets, it’s essential to gather the right materials and tools. The materials you choose will depend on the design you’re aiming for, but here are some common options:
Materials:
- Wood (e.g., reclaimed wood, plywood, or hardwood)
- Steel pipes or metal brackets
- Leather straps or canvas
- Screws, nails, and wood glue
- Paint or stain (optional for finishing)
Tools:
- Saw (if working with wood)
- Drill and drill bits
- Screwdriver or power drill
- Measuring tape and level
- Sandpaper (for wood finishes)
- Paintbrush (if staining or painting)
Step-by-Step Instructions
- Measure and Plan:
Start by measuring the space where you want to install your shelves. Consider the weight of the items you’ll place on the shelves to determine the size and strength of the brackets you’ll need. Also, decide on the style you want, whether it’s a simple shelf supported by metal brackets or a more rustic wood-and-pipe design. - Cut and Prepare Materials:
If you’re using wood, cut your pieces to the desired length. If you’re opting for metal pipes or brackets, measure and cut them accordingly. For a wood-and-metal design, you can attach metal brackets to the wood shelf, or if you’re using leather straps, measure and cut them to the appropriate lengths. - Drill Holes and Attach Brackets:
Once your materials are cut to size, mark and drill holes where the screws will go. If you’re using wood, you may need to drill pilot holes to prevent the wood from splitting. If using pipes or metal brackets, secure them to the wall or your shelf using appropriate fasteners. - Finishing Touches:
Sand any rough edges on your wooden brackets and shelves for a smooth finish. You can then stain or paint the wood to match your existing décor. If using metal pipes, consider applying a coat of protective sealant to prevent rusting, especially if the brackets are exposed to moisture. - Install the Brackets:
With everything built and finished, it’s time to install your brackets on the wall. Be sure to use appropriate anchors, depending on the wall material (drywall, brick, etc.), and always use a level to ensure the brackets are aligned properly. Once secured, place your shelves on the brackets and enjoy your new, stylish storage solution.
Tips for Incorporating DIY Shelving Brackets into Your Home
Use Shelves to Highlight Decor
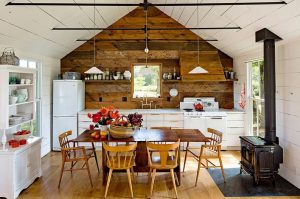
Once your DIY shelving brackets are installed, consider using them to showcase items that reflect your personality and style. Floating shelves, for example, can provide a clean and minimal look, while more traditional brackets can create a more industrial or farmhouse-inspired aesthetic. Use these shelves to display books, plants, decorative vases, or unique artwork, ensuring that they enhance the design and flow of the room.
Mix and Match Materials
To create visual interest, consider mixing materials for your DIY shelves and brackets. A combination of reclaimed wood shelves with metal or leather brackets can create a modern rustic look. Alternatively, industrial-style pipe brackets paired with wood shelves offer a robust and masculine appeal. Mixing materials also allows you to incorporate various textures into your space, adding layers of depth and visual intrigue.
Incorporating DIY shelving brackets into your home offers a simple, cost-effective, and customizable solution for both storage and style. These brackets can transform any room by providing functional space for your items while adding a personal touch to the décor. Whether you choose to make your brackets from wood, metal, or repurposed materials, the result will be a set of shelves that are uniquely yours. With a bit of creativity and the right tools, DIY shelving brackets are an excellent way to enhance your home, all while saving money and supporting sustainability.


+ There are no comments
Add yours