




I still remember a phone call I got four years ago from a panicked client. He had poured a three-gallon batch of epoxy over a custom live-edge walnut dining table, only to watch it smoke, crack, and turn into a sticky, bubbling mess within forty-five minutes. He had ruined a $2,000 piece of lumber in under an hour simply because he misunderstood the chemistry happening inside his mixing bucket.
In my ten-plus years in the home improvement and surface restoration industry, I’ve seen this exact scene play out dozens of times. Working with polymers looks deceptively simple in short social media clips, but high-performance casting is equal parts art and hard chemical science.
Whether you’re pouring a crystal-clear countertop coating or casting a deep-pour river table, mastering a standard epoxy resin kit comes down to controlling three variables: temperature, ratio precision, and ambient humidity. Let’s break down how to get flawless, commercial-grade results on your very first try.
The Polymerization Process: Demystifying the Chemistry
Before you open a single bottle, you need to understand what actually happens when you mix your materials. A two-part epoxy resin kit consists of a resin (Part A) and a hardener (Part B). They don’t dry through evaporation like water-based paint; they cure through an exothermic chemical reaction called cross-linking.
Think of Part A as thousands of individual, open train cars waiting on a track, while Part B acts as the coupling chains. When you combine them in the correct ratio, those chains link the cars together into one continuous, solid steel train. If you don’t add enough coupling chains—or if you add too many—the train falls apart.
+-----------------------------------------------------------------------+
|                       THE CROSS-LINKING REACTION                      |
|                                                                       |
|  [ Part A: Resin ]    +    [ Part B: Hardener ]  ===>  Exothermic Heat|
|  (Monomer Chains)          (Polyamine Cross-Linker)      Reaction     |
|                                                                       |
|                               ====>                                   |
|                                                                       |
|                  [ Rigid 3D Polymer Matrix ]                          |
|                  (Cured Solid Surface)                                |
+-----------------------------------------------------------------------+
Because this reaction generates its own thermal energy, thick pours retain heat faster than thin coats. If that heat builds up too quickly—a phenomenon known as thermal runaway or exothermic flash—the mixture will boil, yellow instantly, and cure with deep structural fractures.
Selecting the Right Epoxy Resin Kit for Your Project
Not all casting kits are engineered the same way. Choosing the wrong formulation for your specific application is the quickest route to project failure.
+-------------------+-----------------------+--------------------+----------------------+
| Formulation Type  | Max Pour Depth        | Pot Life (Working) | Best Application     |
+-------------------+-----------------------+--------------------+----------------------+
| Table Top / Coating| 1/8 in - 1/4 in       | 20 - 30 minutes    | Counters, Art, Bar   |
| Deep Pour / Casting| 1 in - 2 in           | 45 - 90 minutes    | River Tables, Molds  |
| UV-Resistant      | 1/8 in - 1/2 in       | 30 - 45 minutes    | Outdoor / High Light |
+-------------------+-----------------------+--------------------+----------------------+
1. Coating & Table Top Formulations
These are high-viscosity resins designed to self-level at thin depths (typically 1/8 inch). They cure rapidly and yield an extremely hard, scratch-resistant Shore D hardness rating.
-
Ideal for: Refinishing wooden countertops, bar tops, coaster sets, and protective surface sealants.
-
Viscosity: High (thick like warm honey).
2. Deep Pour & Casting Resins
Deep pour formulas feature a much lower viscosity and a slower-acting hardener. This allows heat to dissipate slowly, preventing thermal runaway on thick castings.
-
Ideal for: Silicone mold casting, encapsulations, and live-edge wood river tables up to 2 inches thick in a single pass.
-
Viscosity: Low (thin like vegetable oil), which allows trapped air bubbles to rise naturally to the surface.
Step-by-Step Execution Protocol for Flawless Casts
Achieving a mirror-like finish free of micro-bubbles requires strict shop discipline. Here is the field-tested workflow I mandate on every one of my job sites.
Step 1: Environment Stabilization
Set your workspace temperature strictly between 72°F and 77°F (22°C to 25°C). Cold rooms slow down cross-linking and cause cloudy curing, while hot rooms accelerate the reaction too quickly. Keep relative humidity below 50% to prevent surface amine blush (a greasy film caused by moisture absorption).
Step 2: Precision Measuring (By Volume or Weight)
Never guess your ratios. Read the manufacturer instructions on your epoxy resin kit carefully—some kits require a 1:1 ratio by volume, while others use a 2:1 ratio by weight.
-
Use graduated silicone or plastic mixing cups.
-
Do not attempt to alter the curing speed by adding extra hardener; this will result in a permanently sticky, un-cured mass.
Step 3: The Double-Mix Method
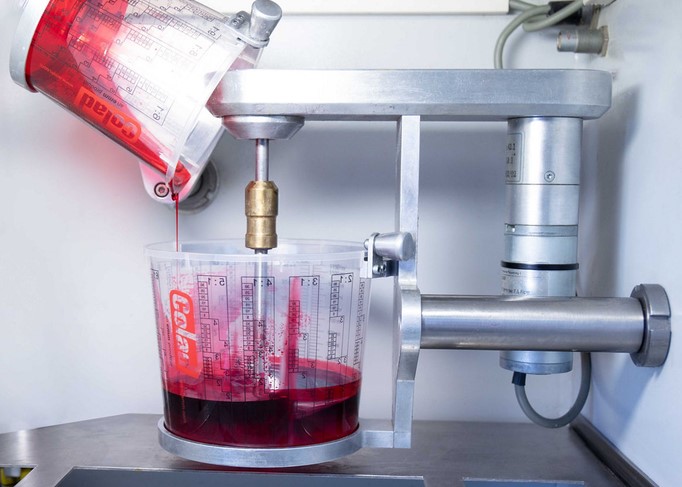
Stir your mixture slowly with a flat-edged paddle for full three minutes, scraping the sides and bottom of the container continuously.
Pour the contents into a second clean container and mix for another two minutes with a fresh stir stick. This guarantees that unmixed resin clinging to the walls of the first bucket won’t ruin your final pour.
[ Step 3A: Container 1 ]           [ Step 3B: Container 2 ]
  Mix for 3 Minutes                  Transfer & Mix 2 Mins
+-----------------------+          +-----------------------+
|  Scrape sides & bottom|  ====>   | Prevents unmixed resin|
|  Slow, deliberate motion         | from creating soft spots|
+-----------------------+          +-----------------------+
Step 4: De-Gassing and Flame Sweeping
Once poured onto your prepared substrate, allow the resin to settle for two to three minutes. Pass a propane torch or heat gun held 6 to 8 inches above the surface in smooth, continuous motions. The heat pops surface micro-bubbles instantly without scorching the polymer matrix.
Pro Tips
Pro Tip: The Substrate Seal Coat
Never pour a thick flood coat directly onto bare, porous wood. Wood fibers contain trapped air that expands as the epoxy warms up, creating an endless stream of stubborn bubbles. Always brush on a thin “seal coat” of high-viscosity epoxy first. Let it tack up for 4 to 6 hours to seal the pores before executing your main pour.
Moisture-Induced Amine Blush
If your ambient humidity spikes above 60% during the cure cycle, the hardener can react with atmospheric carbon dioxide and moisture to form an invisible water-soluble byproduct called amine blush. This creates a slippery, waxy film on your cured surface that prevents subsequent layers from bonding. If this occurs, scrub the surface with warm water and a Scotch-Brite pad before sanding—never sand amine blush directly, or you’ll ground the wax into the finish.
Unlocking Professional-Grade Surfaces
Working with an epoxy resin kit transforms ordinary surfaces into high-durability, museum-quality focal points. Success doesn’t come down to luck; it’s the reward for respecting mixing ratios, controlling ambient climate, and preparing your substrates with surgical precision.
What surface casting or restoration projects are you planning next? Have you run into frustrating sticky spots, micro-bubbles, or thermal issues in your previous builds? Drop your questions and project details in the comments below—I’d be glad to help you troubleshoot your setup!







+ There are no comments
Add yours