





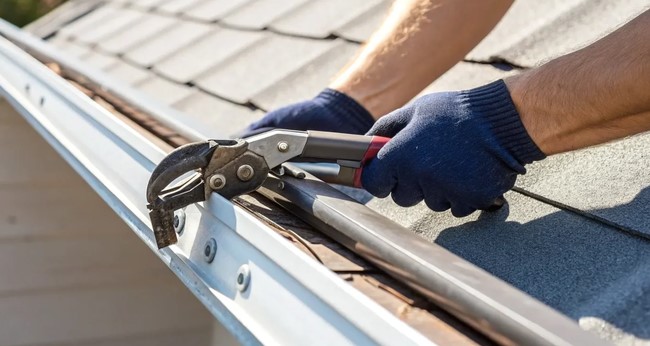
Picture waking up in the middle of a torrential autumn downpour to the sound of a steady, heavy waterfall crashing right outside your bedroom window. You peek through the blinds, only to see water overflowing from your second-story eavestroughs, cascading down like a broken dam, and carving a deep trench straight into your prized landscaping.
If you’ve ever experienced that sinking feeling, you aren’t alone. Over my past ten years in the home improvement trenches—specializing in exterior infrastructure and stormwater mitigation—I’ve seen how quickly a minor gutter leak can transform into a basement flooding disaster.
Most homeowners think of gutters as simple metal troughs, but they are actually precision hydraulic channels. When a joint fails or a seam cracks, you don’t always need a complete system overhaul. Often, the fastest and most cost-effective solution is mastering a professional-grade eavestrough repair kit.
Let’s explore how to diagnose drainage failures and execute permanent fixes like an industry veteran.
The Hidden Cost of Neglected Drainage
Think of your home’s eavestrough system as the circulatory system of your roof. Just like blood vessels need to carry fluid smoothly away from the heart, your gutters must transport thousands of gallons of rainwater safely away from your foundation.
When an eavestrough develops a leak, pinhole, or loose joint, the physics of water takes over. Instead of flowing smoothly toward the downspout, water escapes at the weakest point.
From my field inspections, ignoring minor gutter leaks routinely leads to:
-
Soil erosion that destroys surrounding flower beds and turf.
-
Hydrostatic pressure buildup against foundation walls, causing basement leaks and cracks.
-
Fascia board rot, which compromises the structural anchor points of your roof edge.
-
Ice dam formation during freeze-thaw cycles due to improper drainage slope.
Deploying an eavestrough repair kit at the first sign of dripping or corrosion stops these cascading problems dead in their tracks.
Anatomy of a Professional Eavestrough Repair Kit
Walking down the aisle of a hardware store can be overwhelming, with dozens of caulks, tapes, and metal patches staring back at you. A reliable, high-performance eavestrough repair kit typically packs several critical components designed to fight moisture and thermal stress.
Here is what you should look for inside a quality kit:
-
Butyl Rubber Sealing Tape: A heavy-duty, highly elastic tape that stretches and moves with metal expansion.
-
Waterproof Structural Sealant: A polyurethane or silicone-based adhesive that cures underwater or in damp conditions.
-
Aluminum or Galvanized Patch Plates: Rigid metal backers used to span larger holes or corroded end caps.
-
Surface Prep Wipes/Cleaners: Specialized solvents designed to strip away oils, oxidation, and debris.
+--------------------------------------------------------+
|           EAVESTROUGH REPAIR ANATOMY LAYERS            |
+--------------------------------------------------------+
| [ Top Layer      ]  Flowing Stormwater / Water Shed    |
| [ Middle Sealant ]  Elastomeric Polyurethane Barrier   |
| [ Core Patch     ]  Butyl Tape or Metal Backer Plate   |
| [ Base Metal     ]  Cleaned Aluminum / Steel Gutter    |
+--------------------------------------------------------+
Key Technical Terms (LSI Keywords) to Know
To speak the language of professional drainage engineering, keep these terms in mind:
-
Pitch / Slope: The downward angle (typically 1/4 inch for every 10 feet) required to direct water toward the downspout.
-
Flashing: The metal sheets or strips installed to direct water away from vulnerable roof-to-wall intersections.
-
Galvanic Corrosion: The electrochemical deterioration that occurs when two dissimilar metals (like aluminum and steel) touch in the presence of moisture.
-
Expansion and Contraction: The physical movement of metal channels as outdoor temperatures swing from summer heat to winter freeze.
Step-by-Step Mastery: Applying an Eavestrough Repair Kit
Fixing a leaking gutter isn’t difficult, but it demands strict adherence to surface preparation. If you skip a step, water will find a way underneath your patch within a month.
Follow this field-tested workflow for a permanent fix:
Step 1: Deep Cleaning and Debris Removal
-
Scoop out all leaves, pine needles, and wet sludge from the repair zone.
-
Scrub the interior metal surface using a wire brush to remove chalky oxidation and flaking paint.
-
Wipe the area clean with denatured alcohol to ensure zero grease or moisture remains.
Step 2: Sizing and Positioning the Patch
-
If you are fixing a seam separation or a rust hole, cut a piece of butyl tape or metal backing from your eavestrough repair kit so it extends at least 2 inches past the damaged zone in all directions.
-
Dry-fit the patch to ensure it conforms smoothly to the interior contours of the gutter trough.
Step 3: Pressing and Sealing
-
Peel away the backing film and press the butyl tape or patch firmly into place.
-
Use a seam roller or your thumb to apply heavy pressure from the center outward, eliminating every single air bubble.
-
Bead a line of waterproof elastomeric sealant around the perimeter of the patch for an impenetrable waterproof seal.
Expert Advice: Pro Tips & Hidden Warnings
PRO TIP: The Gravity Check (Slope Verification)When repairing a sagging eavestrough joint, don’t just patch the leak—recheck your slope. Use a string level to ensure the gutter slopes at least a quarter-inch toward the downspout. Otherwise, standing water will pool over your fresh patch, inviting premature breakdown.
⚠️ Hidden Warning: Beware of Galvanic Corrosion
If your home has older aluminum gutters, never use standard galvanized steel screws or patches from an unrated kit. When aluminum and steel touch in wet environments, an electrochemical reaction called galvanic corrosion eats away at the softer metal within weeks. Always match your repair components to your existing gutter material.
Patch vs. Replace: Making the Right Call
While an eavestrough repair kit works wonders for localized damage, it isn’t a cure-all for a failing system. Use this quick reference guide to decide whether to patch or upgrade:
| Damage Type | Recommended Solution | Why? |
| Pinholes or rivet leaks | Eavestrough Repair Kit | Quick, cost-effective, seals localized wear. |
| Leaking end caps or corner miters | Eavestrough Repair Kit | Easily reinforced with butyl tape and sealant. |
| Sagging over 3+ feet | Re-hanger Brackets & Slope Adjustment | Structural support is compromised; patching won’t stop overflow. |
| Widespread rust-through / cracking | Full Gutter Replacement | Material has reached the end of its lifespan. |
Conclusion: Take Command of Your Home Drainage
Protecting your home’s foundation doesn’t always require heavy machinery or a massive renovation budget. By staying proactive, diagnosing drainage issues early, and utilizing a professional-grade eavestrough repair kit, you can extend the life of your exterior infrastructure and safeguard your property from water damage.
Have you checked your gutters lately, or are you currently battling an overflowing eavestrough during heavy rainstorms?
Drop a comment below with your home drainage challenges, and let’s troubleshoot your setup together!









+ There are no comments
Add yours