



A table saw blade spinning at 4,000 RPM doesn’t negotiate, and neither does a slipped wood chisel on a humid Saturday afternoon. Seven years ago, I was managing a custom kitchen renovation when an apprentice took a deep nick to his palm from an exposed utility blade. As blood quickly pooled onto the unvarnished oak floor, we scrambled to the jobsite wall box—only to find three dried-out alcohol wipes, a bent pair of plastic tweezers, and an empty box of adhesive bandages.
In over ten years of stepping onto job sites, designing residential workshops, and retrofitting home spaces, I have observed that emergency preparedness is far too often treated as a decorative afterthought. Most people buy a cheap, plastic emergency box, toss it on a dusty high shelf in the garage, and forget it exists until disaster strikes.
Yet, industry data shows that over 60% of home workshop and maintenance injuries can be treated effectively without emergency room intervention—provided proper medical gear is deployed within the first 60 seconds.
Why Your First Aid Kit Is Your Workspace’s Ultimate Pressure-Relief Valve
To understand the critical role of emergency readiness, think of your home or workshop as a high-pressure mechanical system. You install circuit breakers to instantly trip during an electrical overload, and you install pressure-relief valves on hot water tanks to prevent catastrophic ruptures.
A strategically configured first aid kit serves as that exact same pressure-relief valve for human injury. When a system failure occurs—whether it’s a deep laceration from a circular saw, a thermal flash burn from a propane torch, or eye contamination from flying drywall dust—you need an immediate, pre-engineered intervention that halts tissue damage before it escalates.
Relying on a generic, store-bought box filled mostly with tiny plastic bandages gives a dangerous illusion of security. True facility readiness requires matching your medical hardware to the specific mechanical, thermal, and chemical hazards present in your workspace.
Strategic Placement Logistics: Deploying Your First Aid Kit for Maximum Velocity
If retrieving your first aid kit takes more than ten seconds, your facility layout has already failed you. In emergency trauma triage, the concept of “time-to-intervention” dictates whether a minor cut remains a simple cleanup or turns into a full-blown medical crisis.
Mounting your kit inside a crowded kitchen pantry behind cleaning chemicals or high above a crowded workbench destroys precious response time. Instead, establish dedicated, highly visible triage stations anchored at key risk zones across your property.
+-----------------------------------------------------------------------+
|                 FIRST AID KIT DEPLOYMENT MATRIX                       |
+-----------------------------------------------------------------------+
| Facility Zone     | Primary Hazards           | Mandatory Kit Specs   |
+-----------------------------------------------------------------------+
| Main Workshop     | Lacerations, Dust, Burns  | Heavy ANSI Wall-Mount |
| Kitchen / Utility | Thermal Burns, Shears     | Quick-Release Module  |
| Mobile Work Rig   | Field Trauma, Punctures   | Soft-Pouch Grab-Bag   |
+-----------------------------------------------------------------------+
The Main Workshop Node (High-Risk Zone)
Position a heavy-duty, wall-mounted first aid kit directly adjacent to your primary exit door or main light switch panel. Keeping it near an exit ensures that if a fire or chemical spill occurs, you are moving toward safety while retrieving your supplies.
The Utility & Kitchen Hub (Secondary Zone)
Kitchens and utility rooms are ground zero for thermal burns, glass punctures, and crush injuries from heavy appliances. Mount a compact, quick-release kit at eye level on the inside of a pantry door or near the secondary entrance.
The Mobile Field and Vehicle Rig
If you transport tools to job sites or outdoor projects, maintain a portable soft-shell first aid kit inside your vehicle or main tool stack. Soft pouches absorb shock better than hard plastic cases and fit neatly into truck storage bays.
Curating the Essentials: What Belongs in a Commercial-Grade First Aid Kit
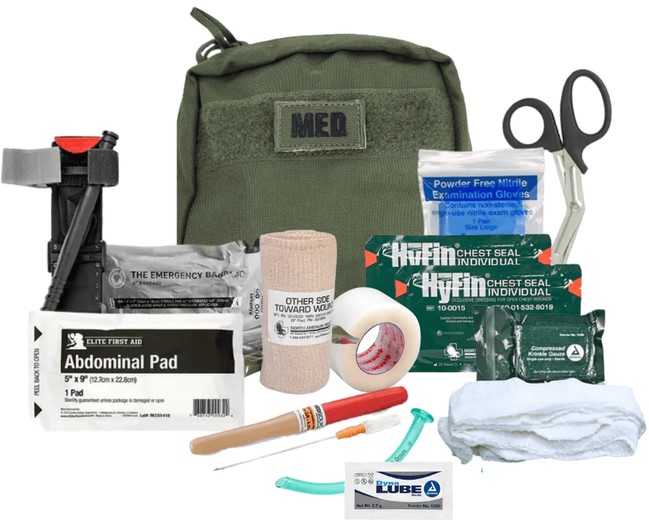
Professional medical readiness is governed by standards like ANSI/ISEA Z308.1, which categorize supplies based on workplace hazards. For a home workshop or serious DIY facility, ditch the basic drug store kits and build your inventory around these core functional categories:
-
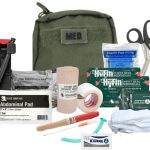
Hemostatic Gauze & Pressure Bandages: Stock heavy-duty 4-inch pressure dressings and hemostatic gauze (treated with kaolin or chitosan) that accelerate blood clotting on contact during severe lacerations.
-
Hydrogel Burn Management: Keep dedicated gel-soaked burn dressings on hand. Unlike ice or cold water, hydrogel draws thermal energy away from damaged tissue without causing micro-vascular freezing or cell destruction.
-
Isotonic Ocular Wash: Store at least two 16-ounce squeeze bottles of sterile isotonic saline solution. When fine sawdust or chemical splashes enter the eye, a dedicated flush bottle allows continuous irrigation without contaminating the socket.
-
Barrier Protection & Trauma Tools: Include several pairs of thick, non-latex nitrile gloves and medical-grade shears capable of cutting straight through heavy denim or work boots.
Hidden Warning: The Climate Degradation TrapNever store your primary first aid kit in an unconditioned shed, attic, or car trunk exposed to direct summer heat. Temperature spikes melt the adhesive backing right off fabric tape, dry out hydrogel burn pads into plastic film, and cause elastic wraps to suffer dry rot long before their printed expiration dates.
Pro-Grade Maintenance: Maintaining Peak First Aid Kit Integrity
An expired or depleted first aid kit is functionally equivalent to having no kit at all. During my routine safety audits, I frequently discover antiseptic wipes that have dried into useless paper scraps and antibiotic ointments that have separated into oily residue.
To ensure your supplies perform flawlessly when an emergency arises, institute a simple maintenance protocol:
-
The Daylight Saving Audit: Every time you adjust your clocks in the spring and fall, conduct a complete inventory audit of every first aid kit on your property.
-
Inspect Packaging Seals: Immediately discard any sterile gauze, eye pad, or bandage whose paper pouch seal appears yellowed, torn, or exposed to moisture.
-
Track Expiration Cycles: Topical ointments, eye flushes, and burn gels carry strict shelf lives. Replace any item within 60 days of its printed expiration mark to guarantee chemical potency.
Pro Tip: The Color-Coded Modular Pouch SystemIn high-stress trauma situations, fine motor skills and cognitive recall drop dramatically. Organize the interior of your first aid kit using color-coded pouches: Red for major bleeding control, Blue for minor cuts and scrapes, and Yellow for thermal burn care. This allows anyone to grab the exact module needed in seconds without dumping supplies across the floor.
Final Thoughts: Build a Culture of Workspace Safety
A truly professional home workshop isn’t defined merely by the horsepower of its table saw or the precision of its laser levels. True craftsmanship lies in constructing a secure environment where physical risks are calculated, controlled, and met with absolute readiness.
Investing an afternoon into strategically selecting, mounting, and stocking your first aid kit ensures that a single split-second mistake never threatens your health, your project, or your livelihood.
Where is your primary emergency kit located right now, and when was the last time you checked its expiration dates? Have you ever had to deal with a sudden injury during a DIY project? Share your field stories, questions, or storage setups in the comments below—I’d love to help you optimize your workspace safety!




+ There are no comments
Add yours