





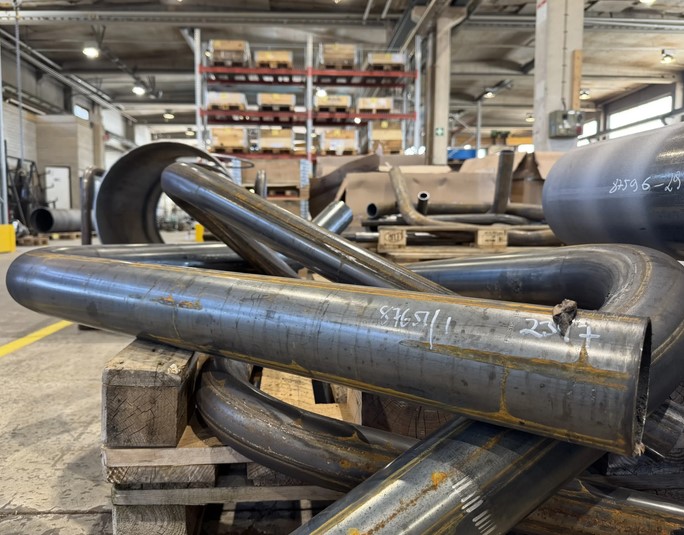
I still remember my early days on commercial jobsites, standing over a pile of kinked Electrical Metallic Tubing (EMT) and feeling completely defeated. I had measured three times, marked the steel carefully, and pulled with all my strength—only to end up with a flattened, useless elbow that looked like a crushed soda can.
Over my ten-plus years in home improvement and electrical fabrication, I’ve realized that bending pipe isn’t about brute force; it’s pure geometry and leverage. Mastering the conduit pipe bender is what separates an amateur DIY job that looks like a tangled mess from a clean, professional installation that runs dead-straight across exposed joists.
Whether you’re running power to a new garage workshop, exposed basement walls, or an outdoor shed, learning to calculate take-off, springback, and offset angles will transform your project. Let’s break down the mechanics, math, and hands-on techniques needed to achieve factory-level precision every single time.
The Mechanical Principles of Conduit Bending
Before you put your foot on the bender pedal, you need to understand how steel tubing reacts under physical stress. When you bend metallic conduit, the outer wall stretches (tension) while the inner wall compresses.
Think of a stick of conduit like a sourdough baguette. If you bend the bread rapidly without supporting its sides, the top crust tears open and the bottom crushes inward. A high-quality conduit pipe bender acts like a curved mold, supporting the side walls of the tubing so the metal flows smoothly around the shoe without collapsing.
                  [ Foot Pressure Point ]
                            ||
                            \/
======================================================
  Conduit Pipe   ====>   [ Curved Bender Shoe ]  <=== Retaining Hook
======================================================
                         ( Tension Zone )   <--- Outer Wall Stretches
                         ( Compression )    <--- Inner Wall Forms Radius
Understanding this force distribution explains why three core variables dictate every successful bend:
-
Take-Off Allowance: The exact length of conduit consumed by the curved sweep of a $90^\circ$ bend (stub-up).
-
Springback: The natural elasticity of steel causing a bend to open up slightly (usually $2^\circ$ to $3^\circ$) after pressure is released.
-
Gain: The difference in length when measuring along the straight pipe versus along the curved arc radius.
Choosing the Right Conduit Pipe Bender & Materials
Matching your tool head to your conduit material is a non-negotiable step. Trying to bend heavy-wall pipe with a light aluminum head will destroy the tool or buckle your material.
| Conduit Material | Wall Thickness | Ideal Bender Shoe Material | Typical Applications |
| EMT (Electrical Metallic Tubing) | Thin-wall steel/aluminum | Cast Aluminum or Ductile Iron | Residential interiors, basements, garage retrofits |
| IMC (Intermediate Metal Conduit) | Medium-wall steel | Heavy-Duty Ductile Iron | Exposed commercial, high-impact areas |
| RMC (Rigid Metal Conduit) | Thick-wall threaded steel | Hydraulic / Power Benders | Main service entrances, direct burial feeds |
For 95% of home improvement and residential workshop projects, you’ll work with $\frac{1}{2}$-inch or $\frac{3}{4}$-inch EMT. A standard aluminum hand bender with a built-in foot pedal and clear degree markings will be your primary workhorse.
The Core Geometry: Master the Essential Marks
Look closely at the shoe of any professional conduit pipe bender, and you’ll see a series of raised symbols cast directly into the metal. These aren’t decorative; they are your mechanical crosshairs.
       [ Arrow ]               [ Rim Notch ]             [ Star ]
          |                          |                      |
          v                          v                      v
     Alignment Mark             Center of $45^\circ$           Back of $90^\circ$
  (For Stub-Up Bends)          Offset Calculations           Stub-Up Benchmark
Key Symbols on the Bender Shoe
-
The Arrow: Aligns directly with your measurement mark for $90^\circ$ stub-ups and the first bend of an offset.
-
The Rim Notch (or $45^\circ$ Center Mark): Indicates the exact center of a $45^\circ$ bend when fabricating saddle bends to hop over obstacles like water pipes.
-
The Star Point: Marks the back of a $90^\circ$ bend when you are measuring from a finished wall back to your bend location.
Step-by-Step Field Execution: Fabrication Protocols
To get uniform, repeatable bends across a long run of conduit, ditch the guesswork and follow this exact field protocol.
Step 1: Calculate Your $90^\circ$ Stub-Up Take-Off
If you need a $90^\circ$ bend where the vertical leg measures exactly 12 inches from the floor:
-
Identify your conduit size. For $\frac{1}{2}$-inch EMT, the standard take-off deduction is 5 inches (for $\frac{3}{4}$-inch EMT, it is 6 inches).
-
Subtract the 5-inch take-off from your 12-inch target: $12 – 5 = 7\text{ inches}$.
-
Measure 7 inches from the end of your conduit pipe and make a sharp pencil mark around the tube.
Step 2: Set the Tool and Body Stance
Place the conduit flat on a solid concrete floor. Slide the bender shoe over the pipe, aligning the Arrow symbol precisely with your 7-inch pencil mark.
Stand over the tool, placing your dominant foot firmly onto the bender’s foot pedal. Keep your body weight centered directly over the shoe—do not rely solely on your arms to pull the handle!
Step 3: Execute the Continuous Smooth Pull
Apply 80% of your effort as downward pressure through your foot, using your hand on the handle primarily for control and stability. Pull in one continuous, fluid motion until the handle angle signals a crisp $90^\circ$ bend. Over-bend by roughly $2^\circ$ to account for natural steel springback.
[ Step 3A: Foot Placement ]          [ Step 3B: Continuous Pull ]
   Weight Over Shoe                    80% Foot / 20% Arm
+-----------------------+            +-----------------------+
| Plant foot firmly     |   ====>    | Sweep downward in one |
| Keep conduit floor-bound|          | smooth motion to $90^\circ$|
+-----------------------+            +-----------------------+
Pro Tips
Pro Tip: The Constant Multiplier for Clean Offsets
When you need to clear an obstacle on a flat wall, an offset bend (two equal opposite bends) is your best solution. For a standard $30^\circ$ offset, the distance between your two alignment marks is always twice the height of the obstacle (Multiplier = 2.0). If you need to clear a 3-inch junction box, space your bend marks exactly 6 inches apart ($3 \times 2 = 6$).
The Foot Pressure Trap
The most common mistake beginners make is pulling the bender handle toward their chest using raw arm strength while letting their foot float off the pedal. This pulls the conduit out of the shoe groove, creating a severe kink right at the apex of the bend that ruins the pipe and makes pulling electrical wire nearly impossible. Always keep heavy, constant foot pressure on the pedal throughout the entire arc!
Elevating Your Electrical Fabrication Skills
Transforming rigid steel tubing into a clean, uniform raceway is one of the most satisfying trades in the home improvement world. Once you respect the geometry built into your conduit pipe bender, stop pulling with your arms, and start applying solid foot pressure, you can tackle complex runs with complete confidence.
What conduit projects are you getting ready to install in your workshop or home? Have you struggled with mysterious kinks or incorrect lengths on past attempts? Drop your questions and project photos in the comments below—I’d be glad to help you troubleshoot your setup!






+ There are no comments
Add yours