


Picture this: You’re walking through your beautifully renovated home with a steaming cup of coffee in one hand and a basket of laundry in the other. You nudge your pantry door shut with your hip, expect it to stay closed, but a second later—creak—it swings back open just enough to block your path. Or worse, your heavy closet door slams shut with a bone-rattling crash because the standard latch didn’t catch properly.
In my 10+ years as a home improvement expert, I’ve seen homeowners spend thousands of dollars on custom cabinetry and premium hardwood doors, only to have the entire experience ruined by a $5 piece of faulty hardware. Doors that won’t stay shut or are frustratingly difficult to open are among the most common complaints I encounter.
The solution isn’t replacing the whole door; it’s upgrading to a roller catch door system. Let’s dive deep into how this simple hardware optimization can completely transform your home’s functionality.
Understanding the Anatomy of a Roller Catch Door
Before we look at the installation, let’s break down what we are actually working with. Think of a standard door knob latch like a deadbolt’s polite younger sibling—it requires you to physically turn a handle to retract a metal tongue from a strike plate.
A roller catch operates on a completely different philosophy. It is the automotive suspension of the architectural hardware world.
The Core Components
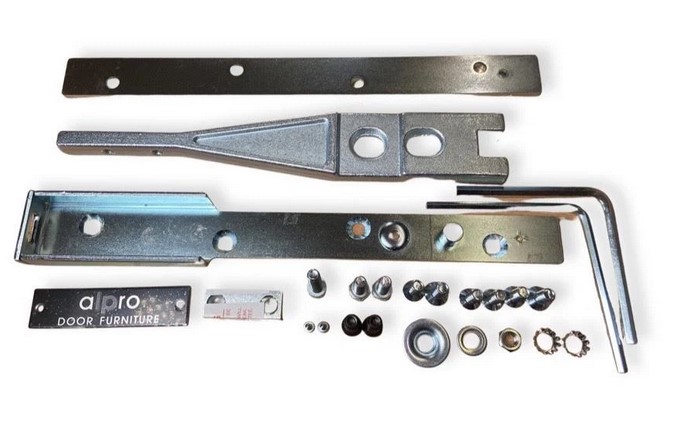
A typical roller catch assembly consists of two primary pieces:
-
The Catch Body: This houses a spring-loaded roller (usually made of durable nylon, solid brass, or stainless steel) and is mortised directly into the top or side of the door leaf.
-
The Strike Plate: A recessed metal plate with a slight depression or curved lip, installed onto the door jamb or cabinet frame.
Instead of a mechanical latch turning, the roller smoothly glides over the strike plate until it drops into the depression, holding the door firmly in place. To open it, you simply push or pull with enough force to compress the internal springs and release the roller. No turning required.
Why Choose a Roller Catch Over Traditional Latches?
During my years in the field, I’ve recommended the roller catch door system for a wide variety of residential applications. Here is why this specific hardware optimization stands out from standard dummy handles or magnetic catches.
1. Seamless High-Traffic Access
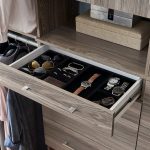
If you have a walk-in pantry, a laundry room, or a walk-in closet, your hands are frequently full when accessing these spaces. A roller catch allows you to install dummy knobs or sleek pull bars. You can push the door open with an elbow and pull it shut behind you effortlessly.
2. Whisper-Quiet Operation
Traditional tubular latches make a distinct, metallic click-clack sound when closing. If you have a nursery, a home office, or a bedroom near a noisy hallway, that sound can be a constant nuisance. A high-quality nylon roller catch offers near-silent operation, keeping your home peaceful.
3. Customizable Tension Control
One of my favorite “insider insights” about roller catches is their adjustability. Most heavy-duty roller catches feature dual adjustment screws. By turning these screws, you can alter the spring tension.
Expert Analogy: Adjusting a roller catch is just like tuning a guitar. You can tighten the tension for a heavy exterior-grade door so it won’t blow open in a draft, or loosen it for a lightweight pantry door so your kids can open it without a struggle.
Technical Breakdown: Materials and Longevity
When shopping for a roller catch door setup, do not just buy the cheapest option at your local big-box hardware store. Material selection dictates whether your hardware will last for two years or two decades.
| Material | Best Used For | Pros | Cons |
| Solid Brass & Nylon Roller | Interior residential doors, pantries, closets | Smooth, self-lubricating, incredibly quiet | Moderate price point |
| Stainless Steel | Heavy utility doors, coastal areas, damp basements | Rust-resistant, handles high-weight doors | Can be slightly noisier |
| Lightweight Thermoplastic | Small cabinet doors, lightweight panels | Extremely affordable, easy to install | Prone to cracking under heavy loads |
For standard interior doors, I always advocate for a heavy-duty brass body with a nylon roller. The nylon self-lubricates against the brass casing, ensuring the mechanism won’t seize up or squeak over time.
Step-by-Step Installation: The Contractor’s Approach
Many DIYers are intimidated by mortising hardware into a door, but with patience and the right approach, you can achieve a professional-grade fit. Here is how I train my apprentices to install a roller catch door flawlessly.
Tools You Will Need:
-
A high-quality roller catch kit
-
Sharp wood chisel (1/2 inch and 1 inch)
-
Mallet or hammer
-
Combination square and marking knife
-
Power drill with pilot bit
-
Painter’s tape
Step 1: Marking the Centerline
Do not eyeball this step! Close the door and use your combination square to mark a precise centerline across the top edge of the door leaf and transfer that exact line to the upper door jamb.
Step 2: Mortising the Catch Body
Place the catch body on the top edge of the door, trace its outline with a sharp marking knife, and score the perimeter. Use your chisel and mallet to carefully remove the wood within the scored lines until the catch faceplate sits perfectly flush with the wood surface.
Step 3: Drilling the Housing Depth
Drill out the center area to accommodate the depth of the spring mechanism chamber. Vacuum out the wood shavings, insert the catch body, and secure it with the provided wood screws.
Step 4: Aligning the Strike Plate
This is where most beginners mess up. Apply a small piece of painter’s tape to the door jamb. Rub a bit of graphite from a pencil or a dab of lipstick onto the protruding roller. Close the door firmly. The roller will leave a mark on the tape, showing you exactly where the center of the strike plate needs to sit.
Step 5: Final Chiseling and Adjusting
Mortise the strike plate into the jamb using the same method as Step 2. Once secured, test the door swing. If it takes too much effort to pull open, turn the adjustment screws counterclockwise to back off the spring tension.
Pro Tips and Hidden Pitfalls to Avoid
Throughout my career, I’ve had to fix countless botched hardware installations. Here are a few pieces of expert advice to ensure your project goes off without a hitch:
-
The Hidden Warning on House Settling: Houses naturally shift and settle over time, especially during seasonal transitions. If you install a roller catch with zero tolerance, a minor structural shift can misalign the roller from the strike plate. Always choose a strike plate with a wide, forgiving lip to accommodate minor seasonal shifting.
-
Mind the Gap: Ensure your door clearanes (the gap between the top of the door and the jamb) is at least 1/8 inch to 3/16 inch. If the gap is too tight, the roller casing will rub against the frame, damaging your trim paint.
-
Lubrication Secret: Never use standard WD-40 inside a roller catch mechanism. It attracts household dust and pet dander, turning into a sticky paste that jams the springs. Instead, use a dry graphite lubricant or a silicone-based spray.
Elevating Your Home Hardware Experience
Optimizing your home isn’t always about knocking down walls or ripping up flooring. True luxury and comfort lie in the seamless execution of daily interactions. Upgrading a problematic entryway to a smooth, whisper-quiet roller catch door eliminates a daily friction point you might not even realize is draining your energy.
Whether you are looking to streamline a busy kitchen pantry or trying to stop an old closet door from constantly drifting open, this project is a cost-effective weekend upgrade that yields major functional dividends.
What about you? Do you have an annoying door in your house that refuses to stay shut, or are you planning a hardware upgrade for an upcoming renovation? Let me know in the comments below, and I’d be happy to troubleshoot your specific hardware dilemmas!


+ There are no comments
Add yours