



It happens in almost every entryway I visit: you open the front door and immediately step into a chaotic obstacle course of scattered sneakers, scuffed dress shoes, and stray boots. Last year, I worked on a hallway redesign where the homeowner spent nearly ten minutes every morning simply hunting for matching footwear before heading to work.
In my over ten years as a home improvement specialist, I’ve realized that the entryway isn’t just a hallway—it’s the primary intake valve of your entire home. When footwear traffic spills into this space without a clear organizational system, it creates visual friction, tracks outdoor contaminants deeper into your living area, and accelerates damage to your expensive shoes.
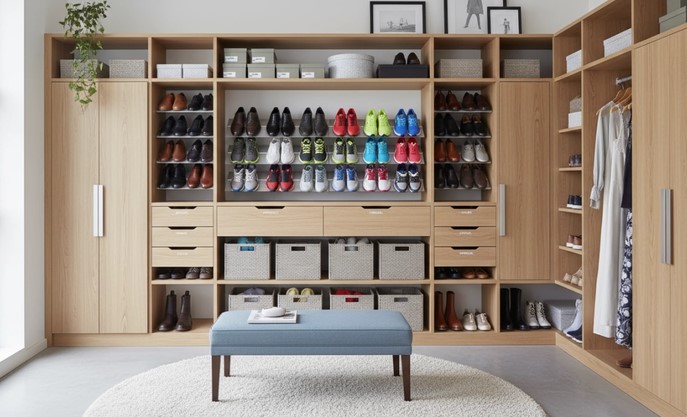
Integrating a well-engineered shoe storage cabinet into your home logistics plan is the fastest way to reclaim precious floor space, establish clean boundaries, and preserve your footwear investment. Let’s break down how to choose, place, and maintain the ideal cabinet system for seamless daily operation.
The Airflow & Material Mechanics: Why Storage Design Matters
Many people treat shoe organization as simple stacking, but storing footwear involves active micro-environments. Shoes absorb significant moisture, perspiration, and outdoor dampness throughout the day.
Think of a pair of leather shoes like a dense sponge. If you seal a wet sponge inside an airtight plastic box without airflow, it won’t take long for mildew, bacteria, and unpleasant odors to take over. A properly constructed shoe storage cabinet acts like a controlled climate zone, balancing concealment with passive air circulation.
          [ Top Surface Display / Entry Drop Zone ]
============================================================
|  / \  / \  | Vent Slots (Passive Cross-Ventilation)    |
| [Shoe Shell] | Adjustable / Tilted Interior Shelves     |
|  \ /  \ /  | Slatted / Louvered Cabinet Front Doors   |
============================================================
  ^                                                      ^
  |-- Elevated Base / Clearance for Ambient Airflow -----|
To maintain structural integrity and air quality, look for three fundamental mechanical features:
-
Slatted or Louvered Doors: Allows continuous air exchange while keeping clutter completely out of sight.
-
Rear Ventilation Cutouts: Prevents humidity build-up against the back wall, protecting both your shoes and your drywall.
-
Elevated Base Legs: Elevates the cabinet off the floor, allowing ambient air to circulate beneath while accommodating floor vents or baseboards.
Selecting the Right Shoe Storage Cabinet Form Factor
Not all entryway footprints are equal. Choosing the right cabinet architecture depends directly on your available square footage and the specific types of footwear your household wears.
| Cabinet Design Type | Depth Profile | Best Footwear Types | Primary Structural Advantage |
| Slim Flip-Down Drawers | 6 to 10 inches | Flats, sneakers, low-top shoes | Ultra-shallow depth; ideal for narrow hallways |
| Traditional Shelved Cabinet | 13 to 16 inches | High-tops, boots, heels, bulky soles | Adjustable shelf heights; high total capacity |
| Bench-Style Integrated Storage | 14 to 18 inches | Daily wear, kids’ shoes, slip-ons | Dual-purpose design; built-in seating for donning footwear |
1. Ultra-Slim Flip-Down Drawers
These space-saving units feature internal tipping buckets that hold shoes vertically or at an angle.
-
Best used for: Compact apartments, tight mudrooms, or narrow entryways where every inch of hallway width counts.
-
Material considerations: Look for heavy-duty metal hinge mechanisms over cheap plastic hardware, as daily tipping creates continuous leverage stress on the joints.
2. Deep Adjustable-Shelf Cabinets
These hinged-door cabinets resemble classic furniture sideboards, featuring interior shelves supported by adjustable pegs.
-
Best used for: Large households requiring flexible storage for winter boots, high heels, and heavy work boots.
-
Material considerations: Kiln-dried hardwoods or high-density engineered wood with a moisture-resistant melamine or wood veneer finish perform best against damp soles.
Step-by-Step Installation Protocol: Securing Your Setup
Installing a shoe storage cabinet seems straightforward, but taking shortcuts during mounting can result in unstable furniture or damaged walls. Here is the exact field protocol I follow on every installation project.
Step 1: Account for Baseboard Gaps
Most traditional cabinets have flat backs that hit the top of baseboard molding, leaving an unsightly and unstable 1-to-2-inch gap against the wall. Choose a cabinet with pre-cut baseboard notches, or install spacer blocks behind the top mounting rail to maintain a flush fit.
Step 2: Anchor Securely to Wall Studs
Because narrow cabinets (especially flip-down models) shift their center of gravity forward when fully loaded and pulled open, tip-over risks are high. Use an electronic stud finder to locate framing studs, and secure the top mounting bracket directly into wood studs using heavy-duty drywall screws and washers.
Step 3: Calibrate Internal Shelf Pitch
If using an adjustable-shelf shoe storage cabinet, set your shelves at a downward 15-degree pitch if the hardware allows. Angling the shelves increases accessibility, maximizes vertical clearance, and makes reading shoe labels effortless when standing up.
[ Step 1: Baseboard Check ]           [ Step 2: Wall Stud Anchoring ]
  Measure molding clearance             Secure top rail to framing
+----------------------------+        +----------------------------+
| Add rear spacers if needed | ====>  | Drive heavy-duty screws    |
| Keep unit plumb and steady |        | to eliminate tipping risks |
+----------------------------+        +----------------------------+
Pro Tips
Pro Tip: The Charcoal Odor-Absorbing Protocol
Even with slatted doors, active footwear transfers odors into enclosed spaces. Hide two activated bamboo charcoal sachets inside the rear corners of each drawer tier. Unlike synthetic air fresheners that merely mask smells, porous activated charcoal actively adsorbs volatile organic compounds (VOCs) and excess atmospheric moisture without leaking chemicals onto your shoe linings.
The Wet Sole Trapping Trap
Storing soaked snow boots or rain boots directly inside a closed shoe storage cabinet is a recipe for wood swelling and mold growth. Never place soaking-wet shoes straight onto wood or MDF shelves. Always let saturated footwear dry on an open entryway mat for at least two hours before transferring them into your enclosed storage unit.
Elevating Entryway Functional Aesthetics
Reorganizing your home’s entry system isn’t just about hiding clutter—it’s about building a smooth, stress-free routine right at your front door. A properly specified and anchored shoe storage cabinet bridges the gap between rugged utilitarian storage and clean interior styling, giving your entry space the structure it deserves.
How do you currently handle footwear organization in your home entryway? Have you run into challenges with narrow hallways or bulky boot storage in your own layout? Drop your questions and setup thoughts in the comments below—I’d love to help you design a cleaner entry system!



+ There are no comments
Add yours